
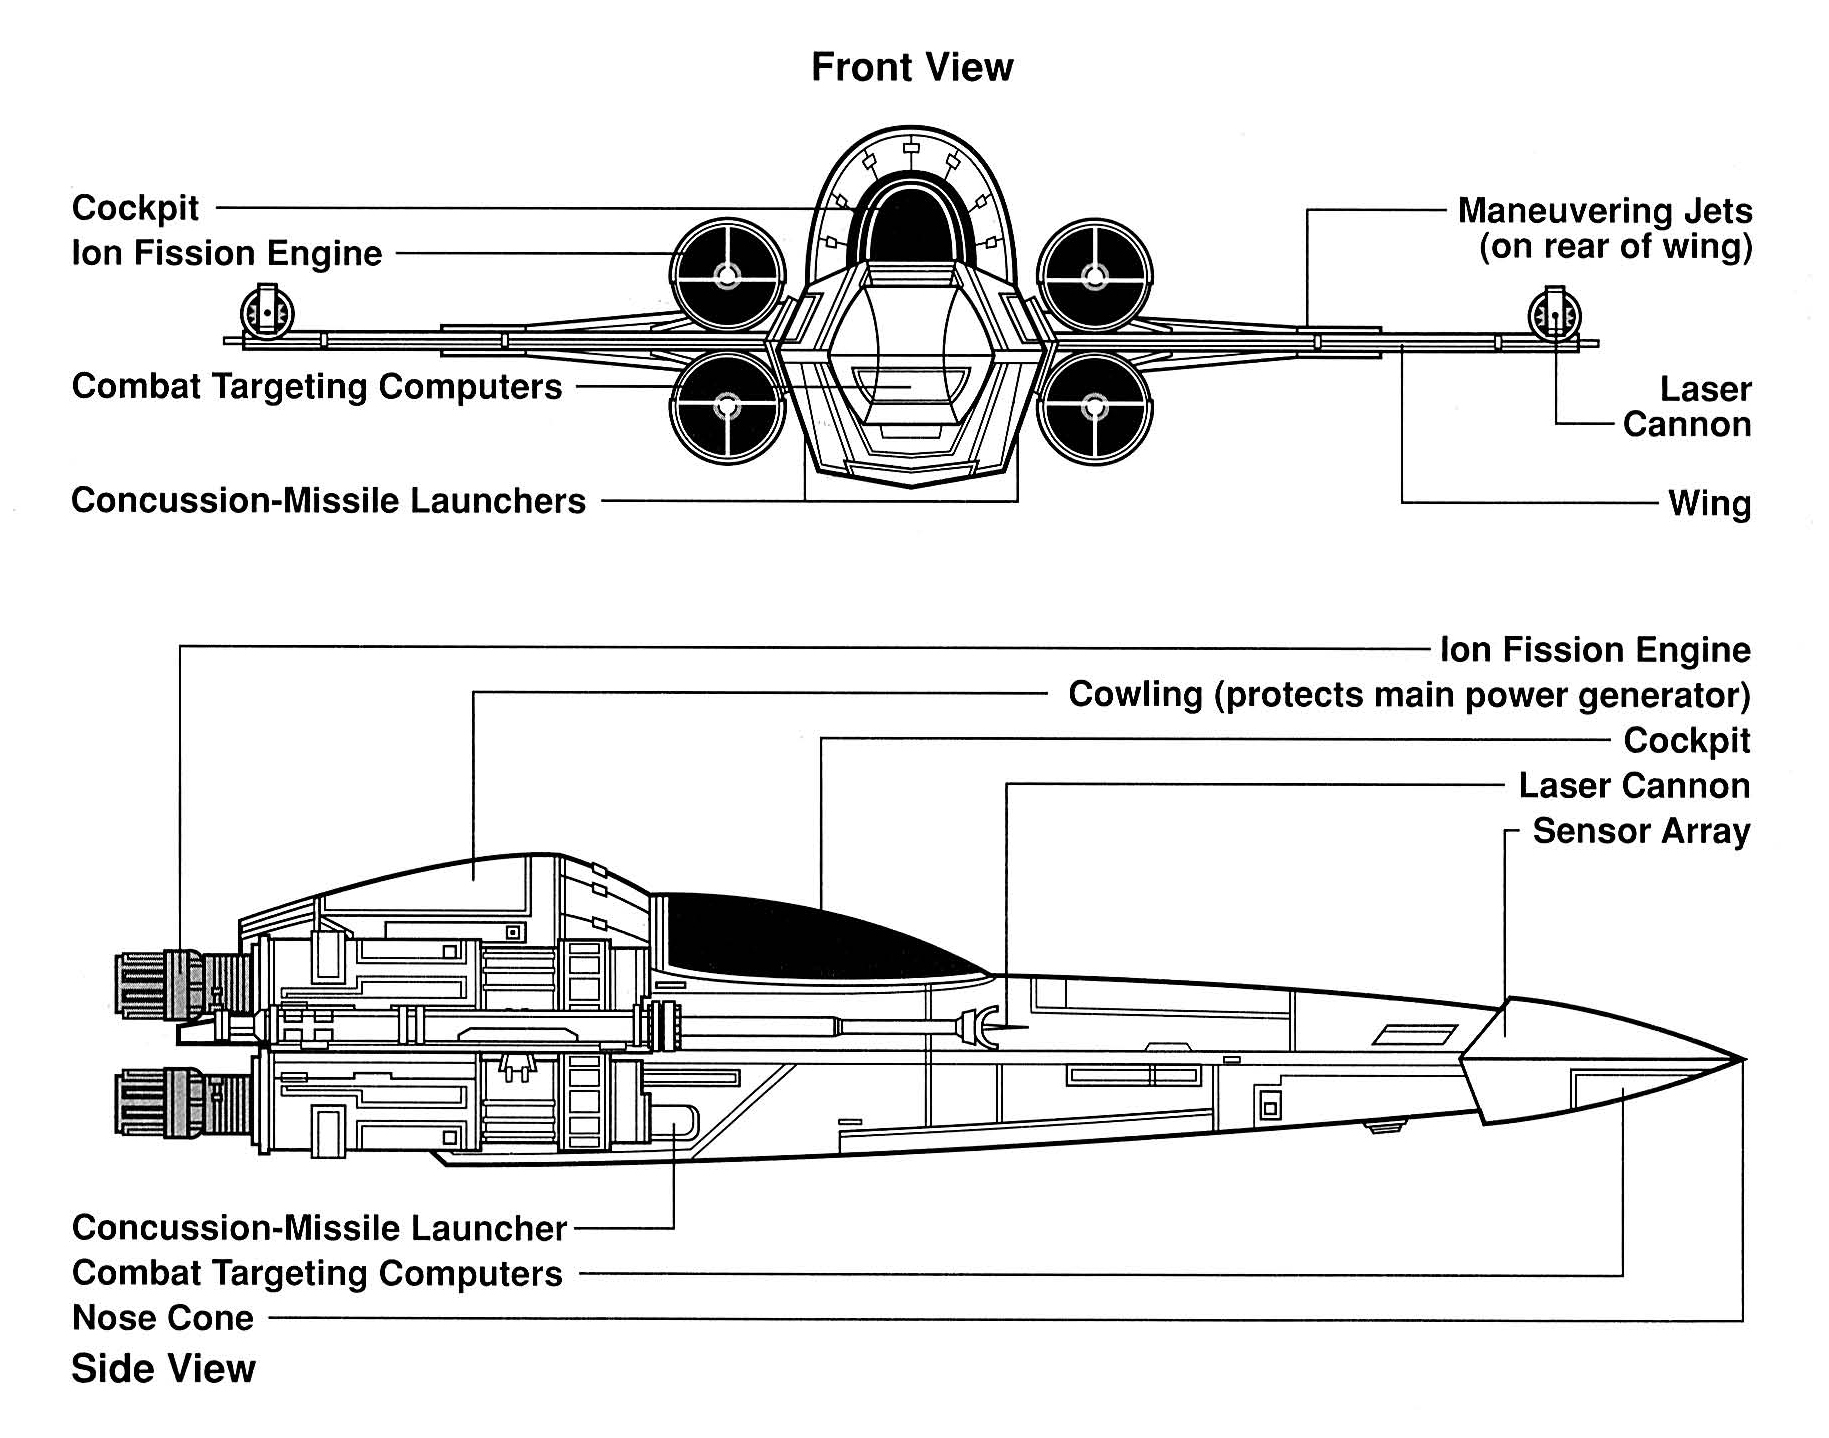

The schematics are useful because it allows me to get an idea of what my model should roughly look like from a front view and side view. The third image allows me to get a good view of what my model should look like from a back view.
The Nose
I started by creating the "nose" of the model by creating a cylinder and reducing its subdivision axis to 6. I also increased the subdivision height to 5. This gave me the amount of sides needed. Using the scale tool I was able to flatten the cylinder to create the shape I wanted. Using the move tool I then stretched the edges at the front of the cylinder to create the pointy noise effect as you can clearly see in the first example image at the top of the post. The outcome is shown below.
The Base
To create the base of the ship I created another cylinder and lowered its subdivision axis to 6. As you can see from the images of the Z95 Headhunter, the base of the ship starts off thin from the front and progressively gets thicker. To manipulate the shape to the way I wanted in Maya, I used the Extrude Tool from the Edit Mesh bar and extruded the face of the cylinder. I then used the scale tool so that I could make the ship progressively get thicker and accurately recreate the shape I wanted.
The Wings
To create both wings I started off by using the cube tool and resizing it to a flat rectangular shape.


To create the laser cannon on the side of the wing, I created multiple cylinders and scaled them to accurately recreate what the Z95 Headhunter's laser cannon looked like.

A new tool I discovered after researching which was to create the curved shape I needed to finish the laser cannon is the "Bend Tool." To use the Bend Tool I had to first create a cube and set its sub division to 10. I then switched to the animation menu set and from the deform menu, I selected the bend tool. Once on the bend attribute editor, I could change how much I wanted the cube to bend by simply changing the curvature.
Before:

After:

Now that the left wing is complete, I used the keyboard shortcut "CTRL + G" to group the wing together.


No comments:
Post a Comment